Ninja forms are one of the leading & known plugins for WordPress which has a wide user portfolio after Contact Form 7, Gravity Forms, Formidable & other leading best WordPress contact forms plugins.
With the help of Ninja Forms, you can create forms without coding knowledge with their drag & drop functionality. You can add it anywhere on your WordPress blog or website.
This form comes with both Freemium & Premium features.
Where the Freemium plan only offers the form creation & data collection, the premium plan offers a lot more than this.
Some of the premium features are:
- Accept Payments using PayPal, Stripe, Elavon etc
- Email Marketing Integrations with leading SAAS like MailChimp, AWeber, ConvertKit & ore
- Users management & analytics
- CRM Integrations like Salesforce, Zoho CRM, Zapier & more
- Notifications & Workflow Upgrades with ClickSend, Twilio, Zapier etc.

Apart from this, the crucial step to track the form which you add on various pages to collect leads, information, contacts. Survey etc.
This is always important to track your forms so that you can measure the performance how your forms are doing or are they worth to add on website etc.
In this blog, we will learn how we can easily set up Ninja Forms conversion tracking using Google Tag Manager & Google Analytics.
To do this, we need to create some tags, triggers and variables. Follow the steps as mentioned below:
Step 1: Create a tag to listen to the actually submitted forms.
This tag is a Javascript code that helps to listen to the variable generated when your form gets actually submitted.
To create this, go to Tags > New > select Custom HTML from the tag types & paste the JavaScript from below:
<script>
jQuery(document).ready( function() {
jQuery(document).on(‘nfFormSubmitResponse’, function(event, response, id) {
dataLayer.push ({
‘event’ : ‘ninjaFormSubmission’,
‘NFformID’ : response.id
});
});
});
</script>
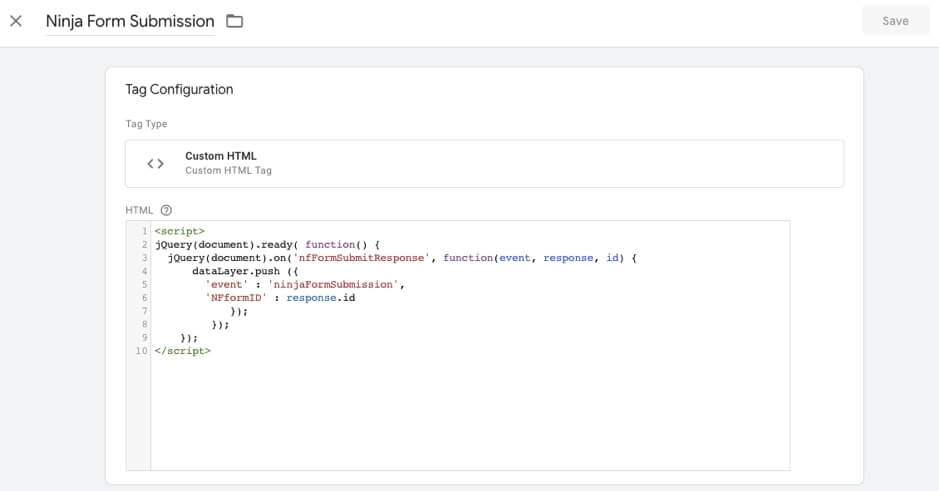
I’ve named mine “Ninja Form Submission”, you can name is at your convenience.
Step 2: Create a data layer variable which is added to data layer to pass values
To create the Ninja Form data layer go to Variables > New > Variable Type (Data Layer Variable) > Name it NFformID (or any name you want to have) & save it.

Step 3: Create a trigger to fire on each form submission
This is very important to create a trigger carefully as this will be fired whenever your form gets submitted.
To create, go to Trigger > New>
Trigger Type: Click – All Elements
Event Name: Contact Us Form Submission or any other you want
This Trigger Fires On Trigger Type > Custom Event
Add ninjaFormSubmission in the Custom event field.
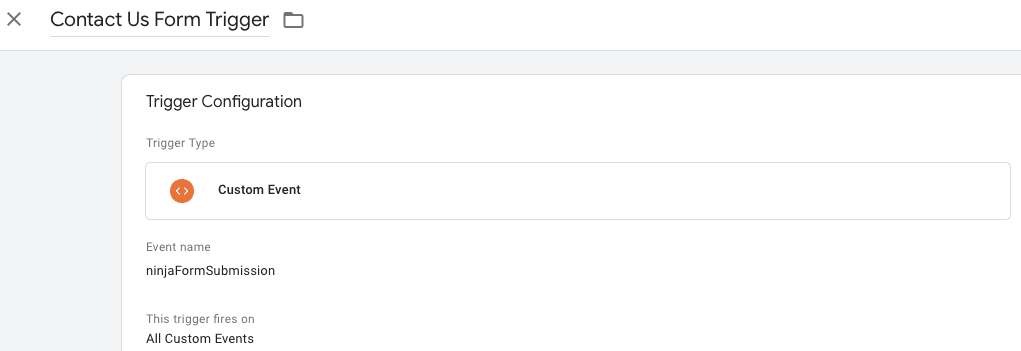
Step 4: Create the tag for form submissions
Now, we need to create another tag which will be as follows:
Go to Tags > New
Tag Type: Google Analytics: GA4 Event
Configuration Tag: Choose Google Analytics 4 Configuration Tag
Event Name: Create an event name. Use underscore in place of space as Google Analytics 4 don’t allow spaces.
Label: Form Submit or anything you want
Non-Interaction Hit: False
Google Analytics Setting: Choose from existing or override to add new
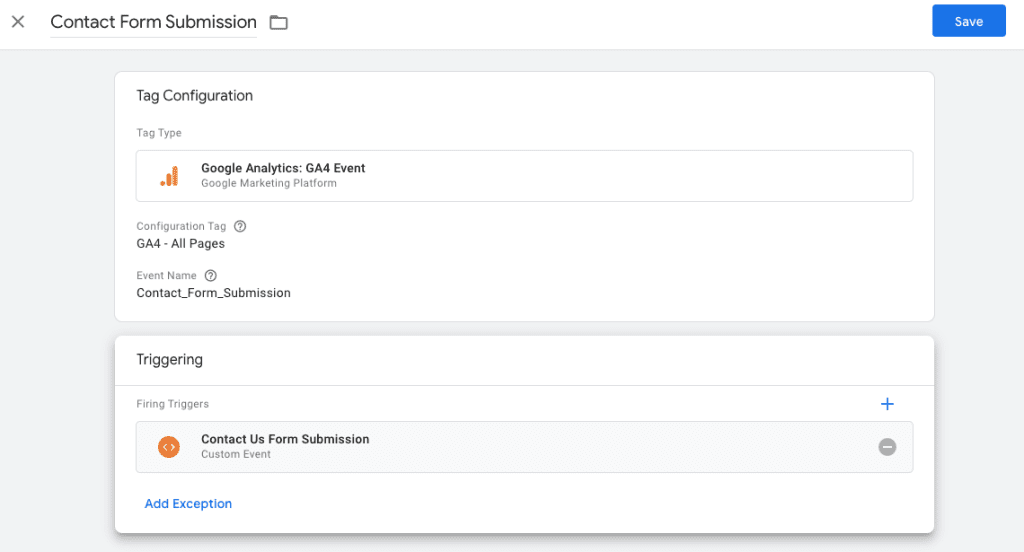
Once you create this tag, fire this to the trigger we have created in Step #3.
Step 5: Setting up the Goal Conversion in Google Analytics 4
Once you have done the tag creation, you need to create the conversion in Google Analytics 4.
To create this, you need to log in to Google Analytics 4 & follow the steps below:
- Google Analytics > Admin > Conversion >
- Click New conversion event button.
- New Event Name: Enter the same Event Name we used in step #4.
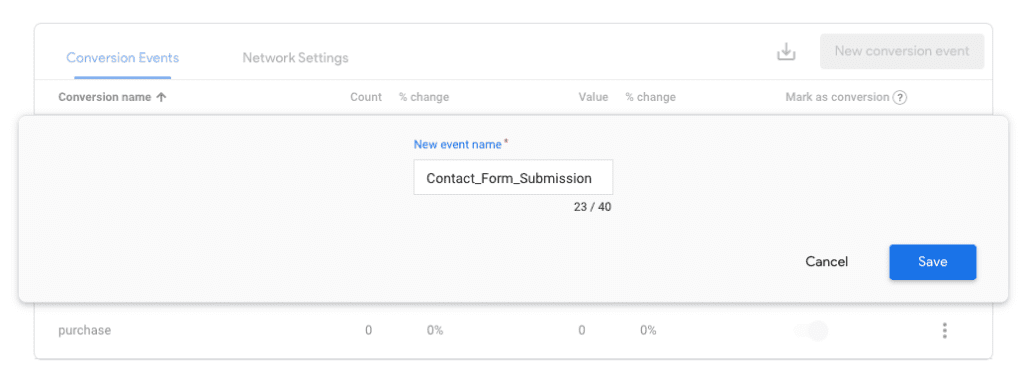
Once you are done with this setup, save this goal.
Always remember to do lots of tests before you move this to live.
If you think we have missed any important information in this blog, let us know if in the comment.
If you are using Contact Form 7, check the Contact Form 7 event setup guide.
If you need any assistance on your SEO campaign, you can hire us by contacting us here.
Need any help or assistance in Google Analytics 4?
Ninja Form Event Tracking FAQs
What is Ninja Forms in WordPress?
How to Track Ninja forms in WordPress?
How to create a Ninja Form in WordPress?
What is event tracking in Ninja forms?
Related Articles
How to Setup Google Ads Conversion Tracking in BigCommerce (With Order Amount & Order ID)
How to Setup Enhanced Ecommerce Tracking to WooCommerce
The Use of Artificial Intelligence (AI) in SEO – All You Need To Know
How to Setup Contact Form 7 Event Tracking with Google Tag Manager